> ## Documentation Index
> Fetch the complete documentation index at: https://docs.withlope.com/llms.txt
> Use this file to discover all available pages before exploring further.
# Clients
> Clients are companies or hiring entities you recruit for. They live inside teamspaces and contain jobs and candidates.
A **client** is a company or hiring entity you're recruiting for. Clients live inside teamspaces and contain **jobs** and **candidates**.
## How clients work
Clients are the middle layer of Lope's hierarchy:
```text theme={null}
Teamspace
└── Client
└── Job
└── Candidates
```
Each client represents one company or organization. Under a client, you create **jobs** (open positions) and add **candidates** to those jobs - or to the client itself if they're not yet assigned to a specific role.
### Creating a client
 1. Open a teamspace in the sidebar.
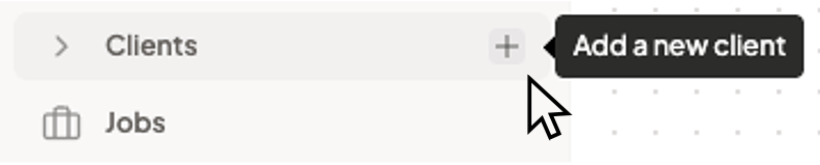
2. Hover in the **Clients** component.
3. Click **+ (Add a new client)** in the right side of the component.
4. Enter the client name (e.g., "Acme Corp", "Tech Startup Inc").
5. Optionally add a description, photo, or emoji.
6. Choose **Public** or **Private**:
* **Public** — All teamspace members can see and work with this client.
* **Private** — Only invited members can access.
**Tip:** Only teamspace members can be invited to a **Private** client. Members in workspace which are **not** invited to a **Private** teamspace that **hosts** this client, cannot be invited.
### Client status
Clients can be:
* **Active** — Currently recruiting for this client
* **Archived** — No longer active; kept for reference
Archived clients are hidden from the main sidebar but can be viewed from the clients list.
### 🏢 Import LinkedIn Company as Client:
If a user wants to import straight from LinkedIn a company of his desire as a **Client** he can simply:
1. Click **+ (Add a new client)** in the Clients component from the sidebar.
2. Paste the **LinkedIn url** from that company (i.e `https:www.linkedin.com/company/name/` ).
3. Click **Import data.**
### Client permissions
| Permission | Who can access |
| ----------- | --------------------------------------------- |
| **Public** | All teamspace members |
| **Private** | Only members explicitly invited to the client |
Access to clients is controlled via **client membership**. If you're a member of a client, you can see its jobs and candidates.
## What lives in a client
* **Jobs** — Open positions you're filling for this client
* **Candidates** — People you're considering, either:
* Assigned to a specific job.
* Assigned to the client only (no job yet).
* Orphaned (no client or job—these live at the workspace level and can be found only at the **Candidates** in the sidebar).
### Candidate access
Your access to candidates follows your client membership:
* **Candidates with a job** — You see them if you're a member of the client.
* **Candidates with client only** — Same rule: client membership grants access.
* **Orphaned candidates** — Visible to all workspace members (in **Candidates**).
## Clients view
From a teamspace, you can open the **Clients** view to see all clients as cards. Each card shows:
* Client name and logo/emoji
* Job count
* Contributors (team members working on this client)
* Status (active/archived)
Click a client to open it and view its jobs and candidates.
## Next steps
* [Jobs](/jobs) — Create job positions under a client
* [Import candidates](/1-manual-insertion) — Add candidates from LinkedIn, manually, or CSV
1. Open a teamspace in the sidebar.
2. Hover in the **Clients** component.
3. Click **+ (Add a new client)** in the right side of the component.
4. Enter the client name (e.g., "Acme Corp", "Tech Startup Inc").
5. Optionally add a description, photo, or emoji.
6. Choose **Public** or **Private**:
* **Public** — All teamspace members can see and work with this client.
* **Private** — Only invited members can access.
**Tip:** Only teamspace members can be invited to a **Private** client. Members in workspace which are **not** invited to a **Private** teamspace that **hosts** this client, cannot be invited.
### Client status
Clients can be:
* **Active** — Currently recruiting for this client
* **Archived** — No longer active; kept for reference
Archived clients are hidden from the main sidebar but can be viewed from the clients list.
### 🏢 Import LinkedIn Company as Client:
If a user wants to import straight from LinkedIn a company of his desire as a **Client** he can simply:
1. Click **+ (Add a new client)** in the Clients component from the sidebar.
2. Paste the **LinkedIn url** from that company (i.e `https:www.linkedin.com/company/name/` ).
3. Click **Import data.**
### Client permissions
| Permission | Who can access |
| ----------- | --------------------------------------------- |
| **Public** | All teamspace members |
| **Private** | Only members explicitly invited to the client |
Access to clients is controlled via **client membership**. If you're a member of a client, you can see its jobs and candidates.
## What lives in a client
* **Jobs** — Open positions you're filling for this client
* **Candidates** — People you're considering, either:
* Assigned to a specific job.
* Assigned to the client only (no job yet).
* Orphaned (no client or job—these live at the workspace level and can be found only at the **Candidates** in the sidebar).
### Candidate access
Your access to candidates follows your client membership:
* **Candidates with a job** — You see them if you're a member of the client.
* **Candidates with client only** — Same rule: client membership grants access.
* **Orphaned candidates** — Visible to all workspace members (in **Candidates**).
## Clients view
From a teamspace, you can open the **Clients** view to see all clients as cards. Each card shows:
* Client name and logo/emoji
* Job count
* Contributors (team members working on this client)
* Status (active/archived)
Click a client to open it and view its jobs and candidates.
## Next steps
* [Jobs](/jobs) — Create job positions under a client
* [Import candidates](/1-manual-insertion) — Add candidates from LinkedIn, manually, or CSV